Overview
The Intake Form (/intake) is the front-desk registration screen. It supports live duplicate detection (name and address), NYC address verification for new students, session-hour validation, cabinet or archive-box location, and a clear success summary after save.
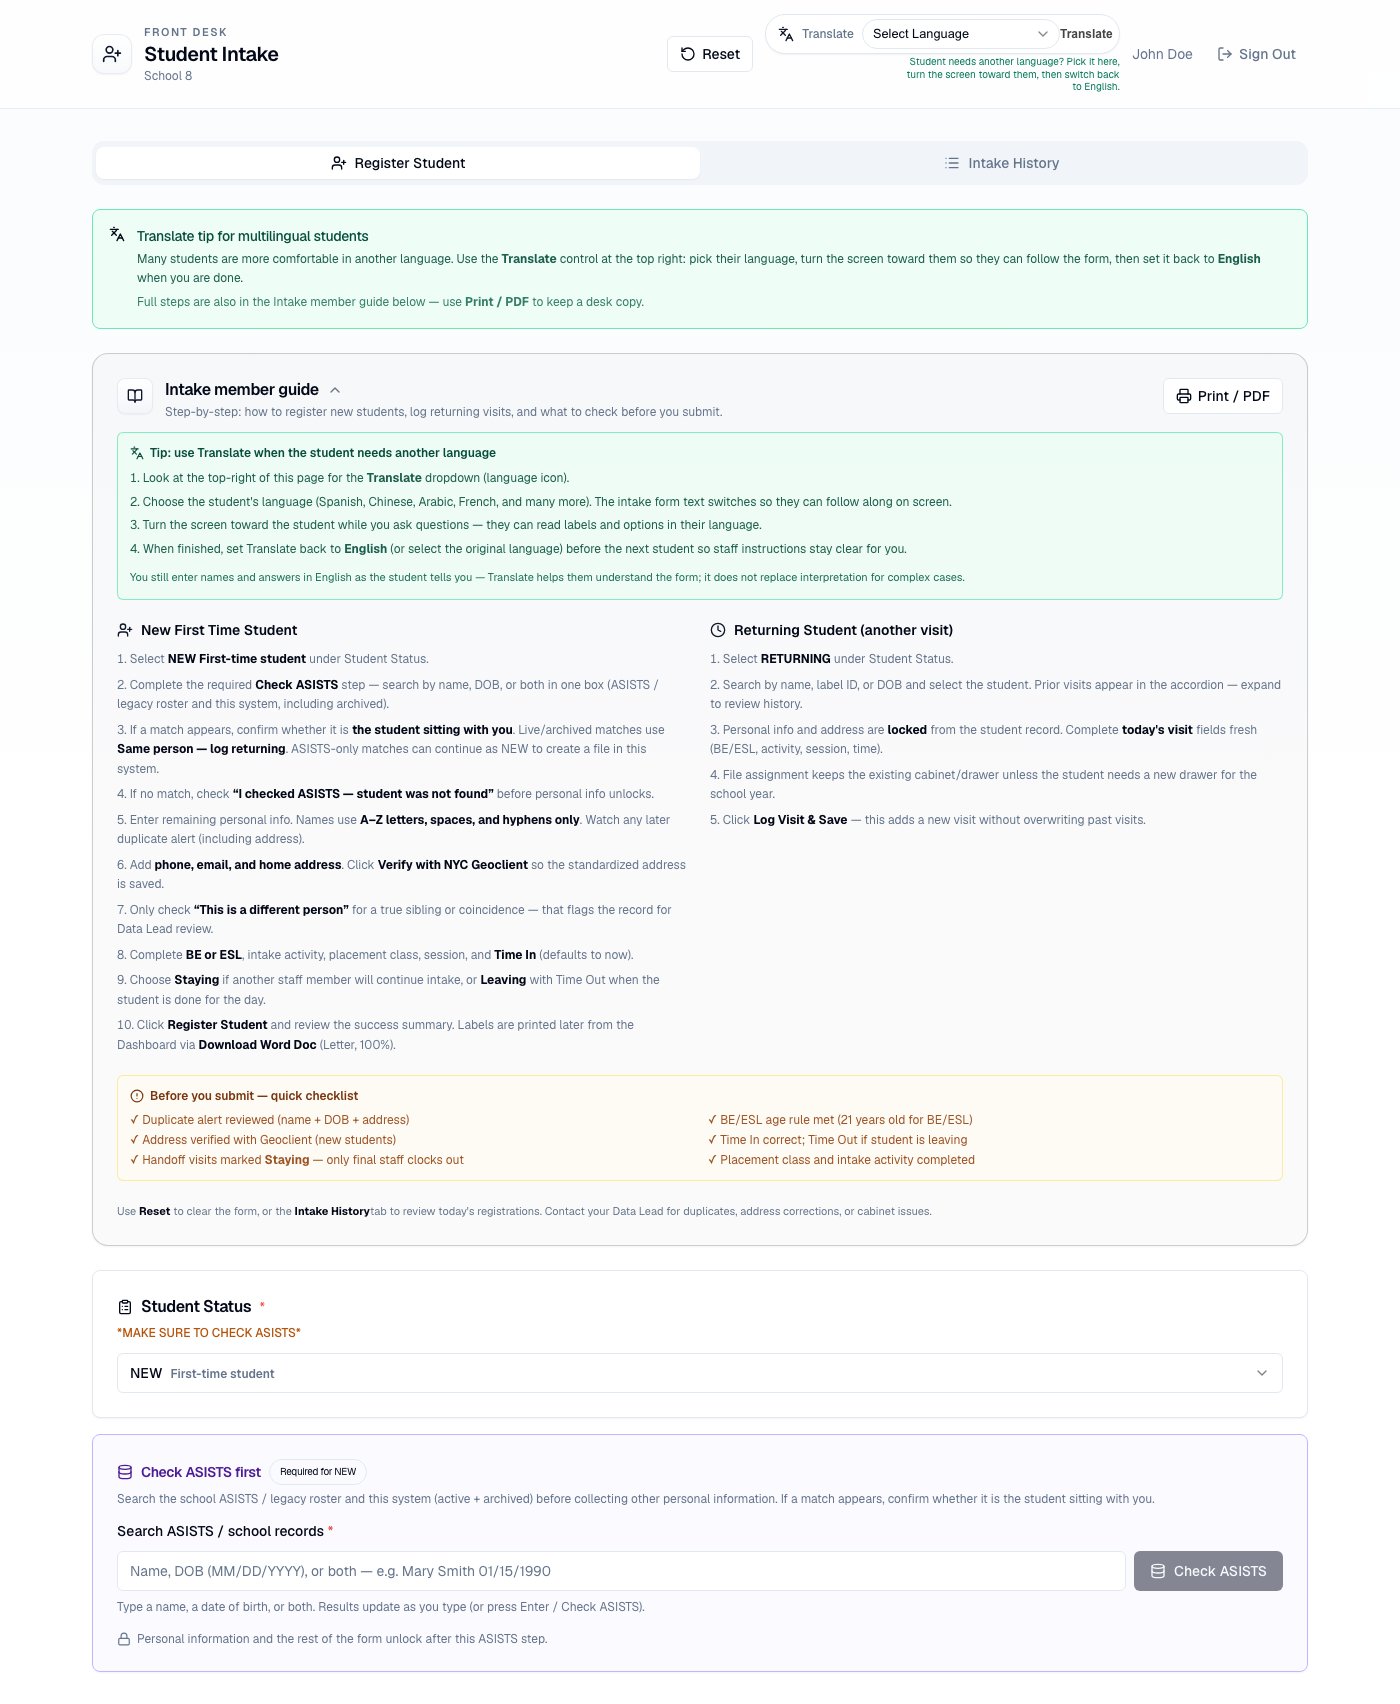
Student Intake form — Register Student tab with personal info, session, and time fields
Intake member guide + Print / PDF
At the top of Register Student, expand Intake member guide for NEW and RETURNING steps plus a pre-submit checklist. Use Print / PDF to save a desk copy (browser print → Save as PDF).Draft recovery (idle sign-out)
Intake autosaves a draft in this browser while you type (per signed-in staff account). If the idle prompt signs you out mid-registration, sign back in and choose Resume draft or Discard. Drafts expire after 24 hours and clear after a successful save or Reset. The idle dialog on/intake reminds you that a draft is saved before sign-out.
Translate for multilingual students
Many students are more comfortable in another language. Use the Translate control at the top right of Intake:- Open the language dropdown (language icon).
- Choose the student’s language (Spanish, Chinese, Arabic, French, and many more).
- Turn the screen toward the student so they can follow labels and options.
- Set Translate back to English before the next student.
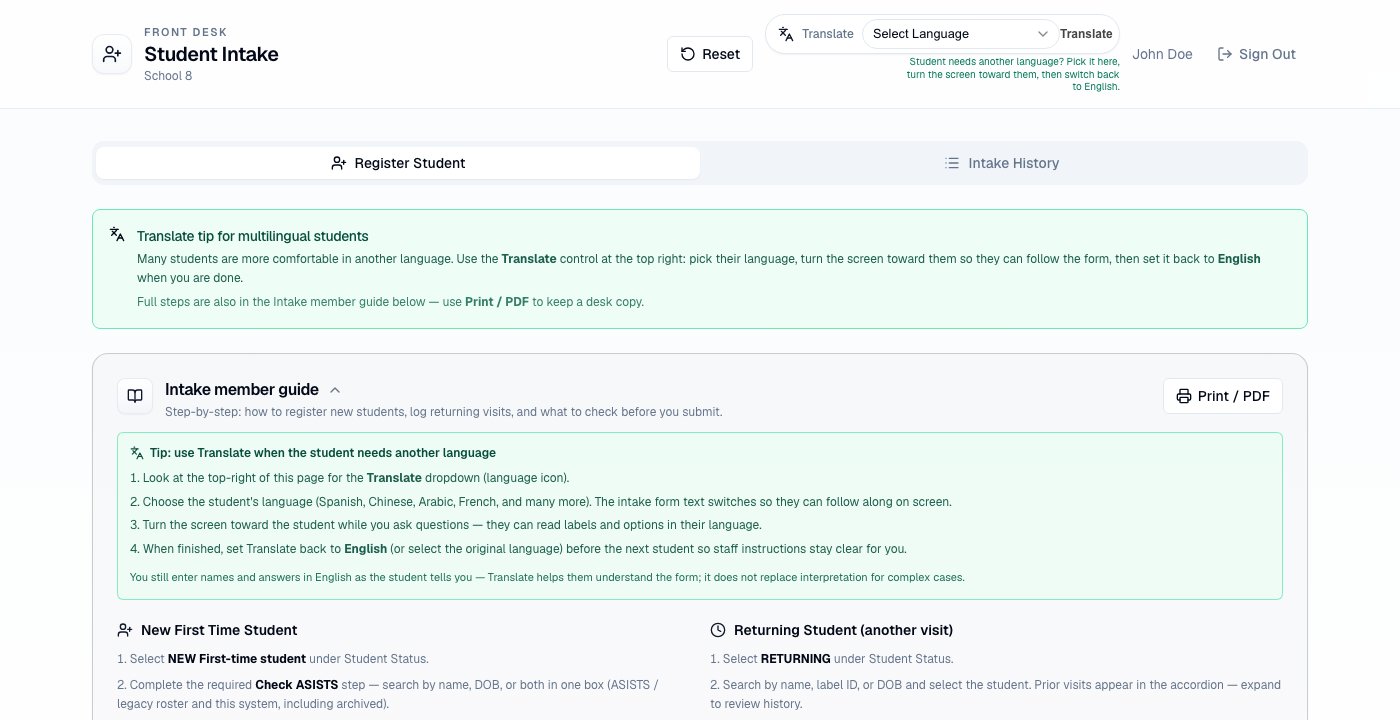
Green Translate tip on Intake — multilingual students
Student types
Continuing Intake was removed. Returning students use RETURNING on the same screen — no separate modal.
NEW student — step by step
1
Open Intake and select NEW
Choose NEW under Student Status.
2
Check ASISTS (required gate)
Search by name, DOB (MM/DD/YYYY or YYYY-MM-DD), or both. A DOB-only search returns only students born that day.
- Live match is the person with you → Same person sitting here — log returning
- Match is a sibling / different person → Not the same person sitting here (unlocks NEW; flagged for Data Lead)
- No match → I checked ASISTS — this student was not found so personal info unlocks
3
Enter personal information
- First and last name (required) — A–Z, spaces, and hyphens
- MI (middle initial) — optional, one letter
- Date of birth — calendar min 1920-01-01, max today; a human-readable date appears under the picker
- Age rules — must be at least 16 for adult education; BE/ESL requires 21 on their birthday, or within 6 weeks of turning 21 (near-eligible — intake may continue with an eligibility notice)
4
Contact and address
- Home phone and cell phone (optional Same as cell for home)
- Emergency contact name/relationship and phone
- Paste full address → Parse, or enter street, Apt/Unit, city, state, ZIP separately
- Verify with NYC Geoclient before submit (when configured)
- View on Google Maps after verify
5
Employment, race/ethnicity, and barriers
Required for NEW students (feeds the ISRF PDF):
- Employment status — choose one
- Hispanic / Latino origin — choose one
- Race / identity — choose all that apply (at least one)
- Barriers to learning / employment — Yes or No for every item
6
Review duplicate matches
After name and DOB are entered, the panel under Date of Birth lists possible matches with % match and Same DOB. Same birthday alone is not enough — the name must be similar (about 50%+), the last names look related, or the home address matches. Unrelated ASISTS hits that only share a DOB stay off the list. See Duplicates and siblings. Only use This is a different person for a true sibling or coincidence. Use Copy alert message or Email with alert to notify your Data Lead with a structured review note.
7
Complete intake details
Choose BE or ESL, intake activities, placement class, intake session, Time In, and Leaving/Staying (Time Out required if Leaving).
8
Submit
Click Register Student. The success screen shows a summary of what was saved — not a label print preview.
NEW student demographics
Employment, Hispanic / Latino origin, race / identity, and barriers are required on NEW intake only. They fill the FY2027 ISRF. RETURNING visits keep personal info locked and do not re-ask these questions.Session hours (required)
Each school configures intake sessions with start and end times (for example MORNING 9:00 AM – 1:00 PM or BUSHWICK EVENING 4:00 PM – 9:00 PM).- Time In and Time Out must fall inside the selected session window
- Invalid times show a red error under the field and block submit
- The allowed window appears under Time In once a session is selected
RETURNING student — step by step
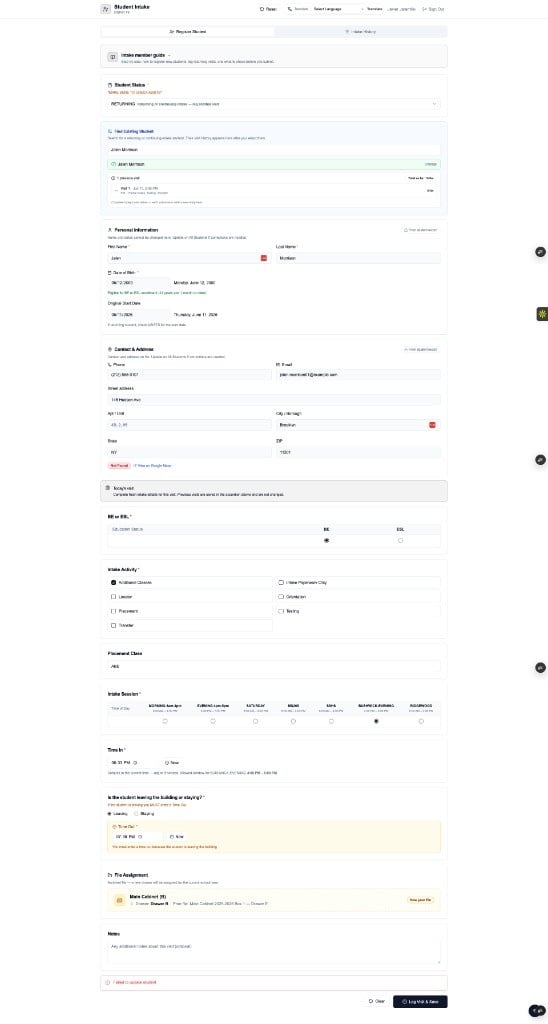
RETURNING student selected — prior visit history and locked profile fields
1
Select RETURNING and search
Search by name and date of birth. Select the matching record from results.
2
Review visit history
An accordion shows prior intake visits (date, session, activities, times). Prior visit data is not overwritten.
3
Personal info and address are locked
Name, DOB, phone, email, and address fields are read-only. Only today’s visit fields are editable.
4
Record today's visit
Enter fresh BE/ESL, session, activities, and time in/out. Submit appends a new visit snapshot. Click Log Visit & Save.
Returning archived students
If the student file is already archived, Intake does not assign a new drawer for the school year.
Staff can scan the archive-box QR to find the physical file when paperwork needs to be added.
Age eligibility (DOB)
Under 21 — Pathways to Graduation (P2G)
Students who are not yet eligible for BE or ESL (and outside the 6-week near-eligible window) can be referred to Pathways to Graduation. Use Copy message for email on the success screen when the under-21 notice appears.Success screen
After save you see:- Student name, ID, and status badges
- A summary of the visit or registration (session, times, activities, contact)
- File location (active drawer or archive box)
- Address with optional Google Maps link
- Under-21 P2G referral card when applicable
Fix intake time issues
The yellow banner at the top of Intake lists students with time problems (outside session hours, overlapping clocks, or a missing Time-Out after the session ended). Same-day return after Leaving is allowed — that is not an error.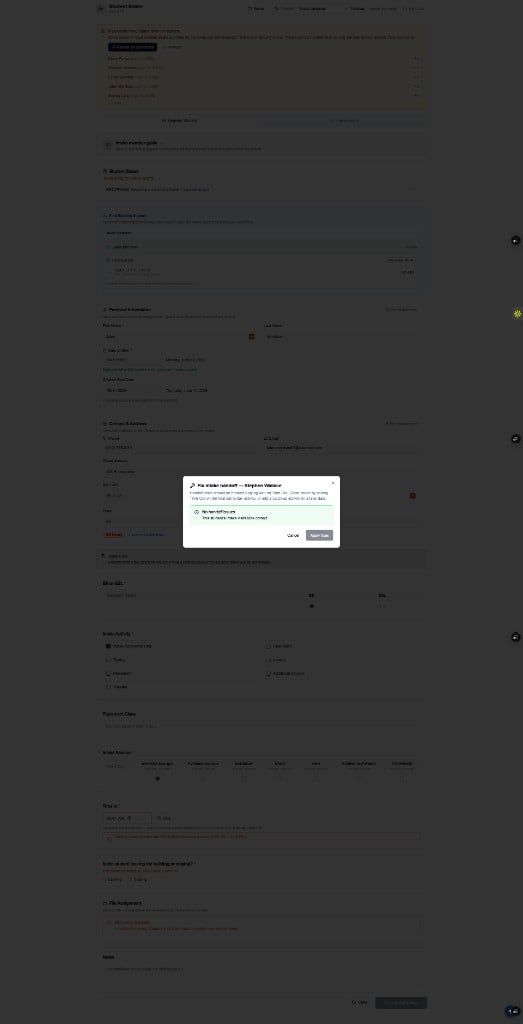
Fix intake issues dialog — correct session hours or missing Time Out
- Correct session hours or overlapping Time In / Time Out
- Set End Time on an open visit (now or session end), or Dismiss & Re-admit if the student left and came back
- Add a catch-up visit on a later date if staff forgot to clock the student out
Duplicate flag example
Match cards show % match and Same DOB. Only check This is a different person for a true sibling or coincidence — that flags the record for Data Lead review on Duplicates and siblings. Under the match list:
The alert includes school, reporter, NEW student fields, match details, and a link to the Duplicates review page.
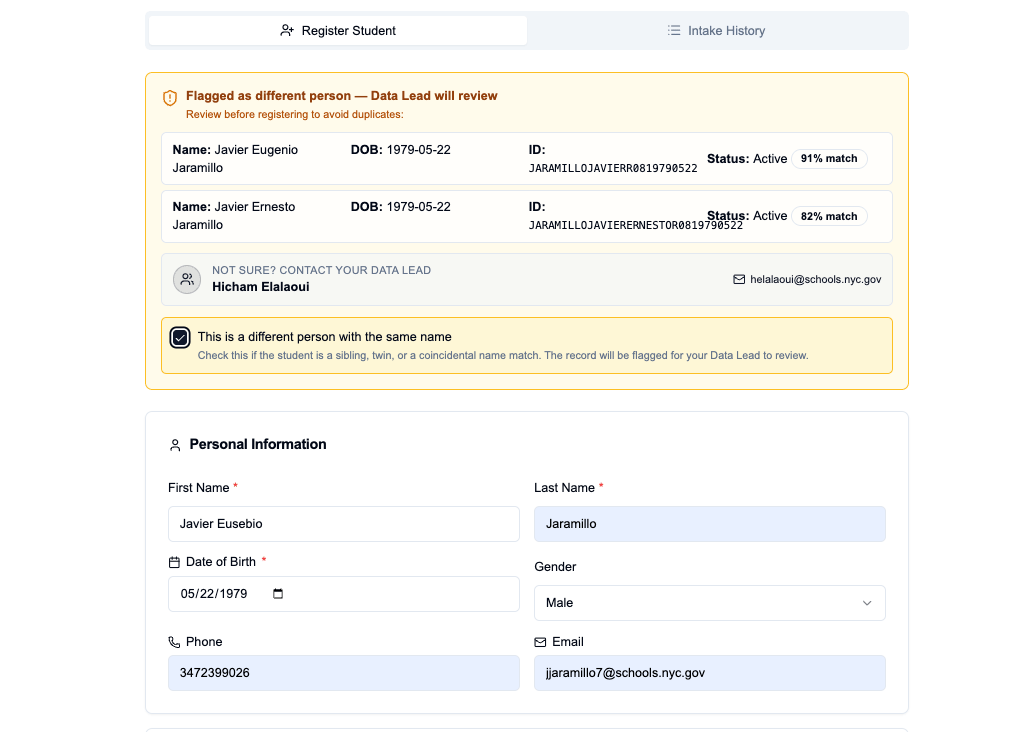
Possible duplicate matches with percent scores and sibling acknowledgement